| Related Documentation |
Version of up.time Affected |
Affected Platforms |
| Connecting to the up.time DataStore via ODBC |
All |
Windows |
Article Contents
Overview
While up.time has a powerful reporting function, you may want to generate reports that use a specific set of data and/or put that data into a custom report format. Using Microsoft Excel, you can take data from the up.time DataStore and use that data to create a report that specifically suits your requirements.
Before You Begin
If you have not already done so, install the MySQL ODBC driver and create a data source to access the up.time DataStore. This article assumes you have performed these steps. For more information, see the Connecting to the up.time DataStore via ODBC Knowledge Base article.
Retrieving up.time Data in Excel 2010: Creating a New Database Connection
Follow these steps to establish the up.time DataSource as an external data source for use in Excel 2010:
- Start Microsoft Excel 2010.
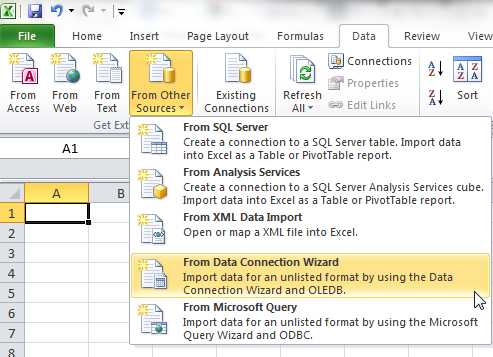
- Open the Data Connection Wizard: click on Data on the menu bar, click on From Other Sources, then click From Data Connection Wizard.
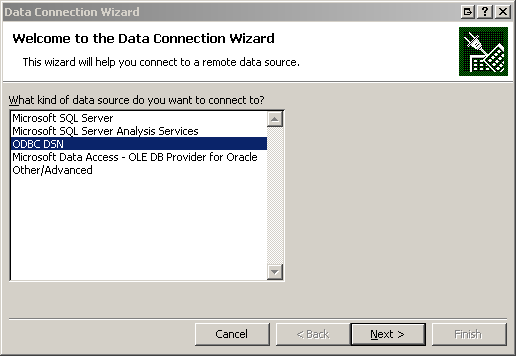
The Data Connection Wizard appears:
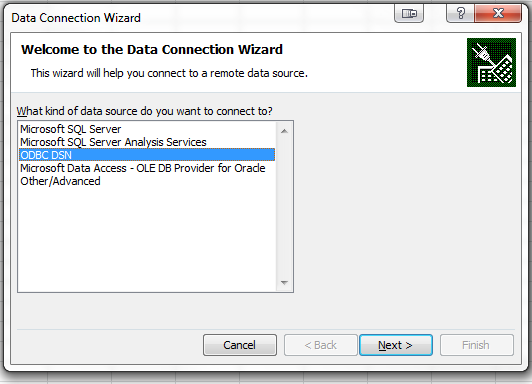
- Select ODBC DSN as the type of data source you want to use to make a connection, then click Next.
- In the next Wizard step, select the up.time ODBC data source, then click Next.
The name of the data source in the list is the name you gave the up.time DataStore when you created its profile in the ODBC Data Source Administrator Control Panel.
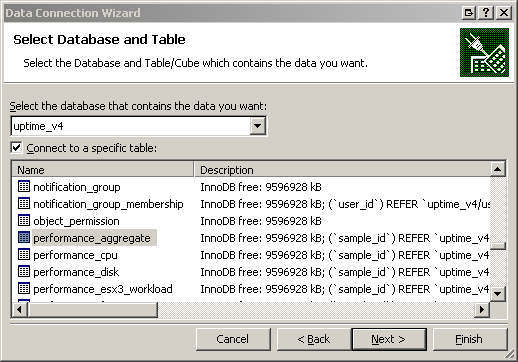
- In the next step, select a database and specific table from the data source:
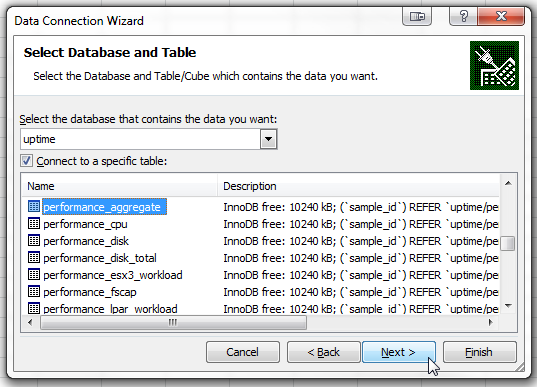
The database name you select is the name you gave to the up.time DataStore when you created its profile in the ODBC Data Source Administrator Control Panel. The database table you select depends on the type of up.time data you want to import into Excel (in this example, we are importing aggregate performance data).
- In the final Wizard step, remember the Friendly Name assigned to this connection profile, then click Finish to save the database connection profile.
Note: Now that you have created an Office database connection (.odc) file for the up.time database and specified table, you will be able to use this existing connection to perform new database queries in future Excel sessions (on the Data tab, in the Get External Data group, click Existing Connections, then select the connection by clicking the Friendly Name). When you begin to work with data using an existing connection, Excel will prompt you with the Import Data dialog box, which you can use to modify your database query.
When you create a connection to the up.time database for the first time, you will always be prompted with the Import Data dialog box; this dialog box is described in the next section.
Retrieving up.time Data in Excel 2010: Querying an Established Database Connection
Follow these steps to import data from an up.time DataSource into Excel 2010:
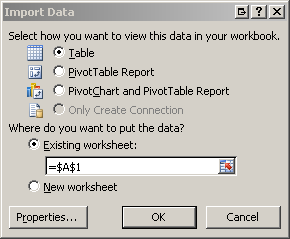
- Whenever you finish creating a connection profile to the up.time DataStore, or open an existing connection profile, the Import Data dialog is displayed:
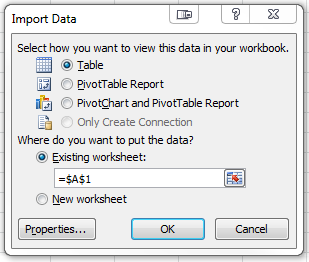
Click Properties.
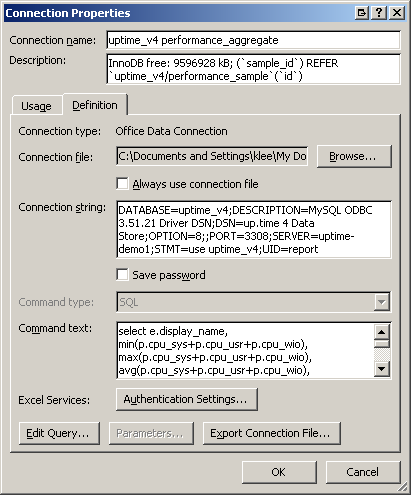
- The Connection Properties dialog is displayed. Click the Definition tab:
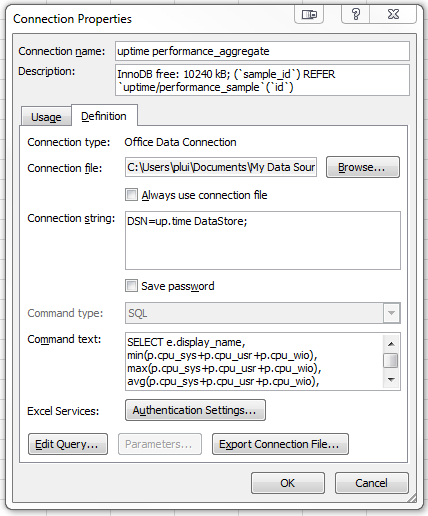
- In the Command text box, enter the SQL statement that retrieves the data you wish to use in Excel. For example:
SELECT e.display_name,
min(p.cpu_sys+p.cpu_usr+p.cpu_wio),
max(p.cpu_sys+p.cpu_usr+p.cpu_wio),
avg(p.cpu_sys+p.cpu_usr+p.cpu_wio),
min(p.free_mem),
max(p.free_mem),
avg(p.free_mem)
FROM performance_aggregate p, performance_sample s, entity e
WHERE p.sample_id = s.id
AND s.uptimehost_id = e.entity_id
AND s.sample_time > DATE_SUB(now(), INTERVAL 7 DAY)
AND s.sample_time < now()
GROUP BY e.display_name
ORDER BY s.sample_time;
This sample query retrieves CPU- and memory-related data that was collected by up.time over the last seven days.
- Click OK.
- If you are prompted with the ODBC 3.51 Connector dialog box, ensure your user and password information is correct, then click OK.
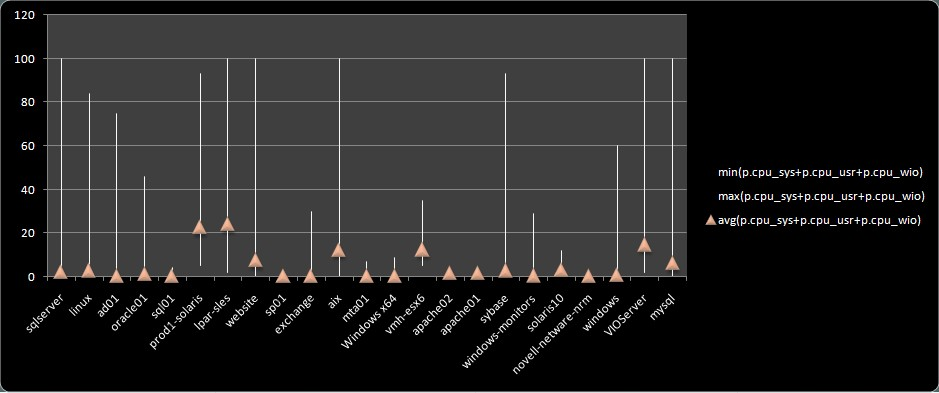
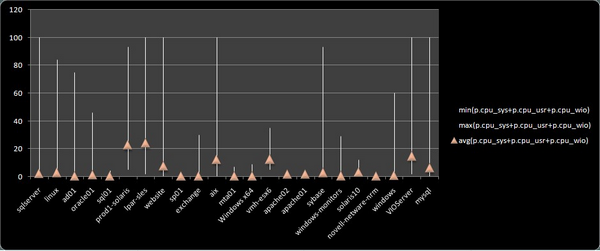
Once your queried data is in an Excel sheet, you can work with it as required. The example below is an inserted table displaying CPU usage highs, lows and averages for all monitored systems over the last seven days.
Retrieving up.time Data in Excel 2007: Creating a New Database Connection
Follow these steps to establish the up.time DataSource as an external data source for use in Excel 2007:
- Start Microsoft Excel 2007.
- Open the Data Connection Wizard: on the Data tab, in the Get External Data group, click From Other Sources, then click From Data Connection Wizard.
The Data Connection Wizard appears:
- Select ODBC DSN as the type of data source you want to use to make a connection, then click Next.
- In the next Wizard step, select the up.time ODBC data source, then click Next.
The name of the data source in the list is the name you gave the up.time DataStore when you created its profile in the ODBC Data Source Administrator Control Panel.
- In the next step, select a database and specific table from the data source:
The database name you select is the name you gave to the up.time DataStore when you created its profile in the ODBC Data Source Administrator Control Panel. The database table you select depends on the type of up.time data you want to import into Excel (in this example, we are importing aggregate performance data).
- In the final Wizard step, remember the Friendly Name assigned to this connection profile, then click Finish to save the database connection profile.
Note: Now that you have created an Office database connection (.odc) file for the up.time database and specified table, you will be able to use this existing connection to perform new database queries in future Excel sessions (on the Data tab, in the Get External Data group, click Existing Connections, then select the connection by clicking the Friendly Name). When you begin to work with data using an existing connection, Excel will prompt you with the Import Data dialog box, which you can use to modify your database query.
When you create a connection to the up.time database for the first time, you will always be prompted with the Import Data dialog box; this dialog box is described in the next section.
Retrieving up.time Data in Excel 2007: Querying an Established Database Connection
Follow these steps to import data from an up.time DataSource into Excel 2007:
- Whenever you finish creating a connection profile to the up.time DataStore, or open an existing connection profile, the Import Data dialog is displayed:
Click Properties.
- The Connection Properties dialog is displayed. Click the Definition tab:
- In the Command text box, enter the SQL statement that retrieves the data you wish to use in Excel. For example:
SELECT e.display_name,
min(p.cpu_sys+p.cpu_usr+p.cpu_wio),
max(p.cpu_sys+p.cpu_usr+p.cpu_wio),
avg(p.cpu_sys+p.cpu_usr+p.cpu_wio),
min(p.free_mem),
max(p.free_mem),
avg(p.free_mem)
FROM performance_aggregate p, performance_sample s, entity e
WHERE p.sample_id = s.id
AND s.uptimehost_id = e.entity_id
AND s.sample_time > DATE_SUB(now(), INTERVAL 7 DAY)
AND s.sample_time < now()
GROUP BY e.display_name
ORDER BY s.sample_time;
This sample query retrieves CPU- and memory-related data that was collected by up.time over the last seven days.
- Click OK.
- If you are prompted with the ODBC 3.51 Connector dialog box, ensure your user and password information is correct, then click OK.
Once your queried data is in an Excel sheet, you can work with it as required. The example below is an inserted table displaying CPU usage highs, lows and averages for all monitored systems over the last seven days.
Retrieving up.time Data in Excel 2003
Follow these steps to establish the up.time DataSource as an external data source for use in Excel 2003:
- Start Microsoft Office Excel 2003.
- On the Data menu, click Import External Data, then click New Database Query.
- The Choose Data Source dialog box is displayed:
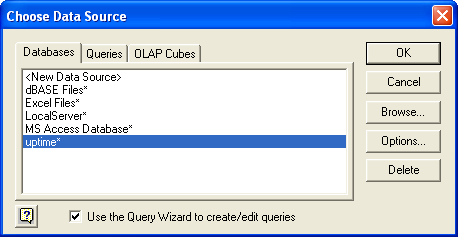
On the Databases tab, select the up.time ODBC data source.
The name of the data source in the list is the name you gave the up.time DataStore when you created its profile in the ODBC Data Source Administrator Control Panel (in this example, the database is simply named "uptime").
Click OK.
- The Query Wizard appears:
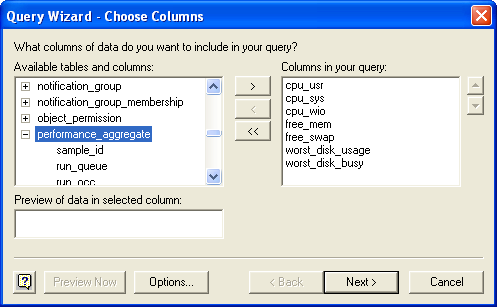
Choose the columns (and tables) to include in your query, then click Next.
- For the Filter Data Wizard step, if desired, provide specific rows to include in your query, then click Next.
- For the Sort Order Wizard step, if desired, indicate how the data will be sorted, then click Next.
- On the final Wizard step, opt to View data or edit query in Microsoft Query, then click Finish.
- The Import Data dialog box is displayed:
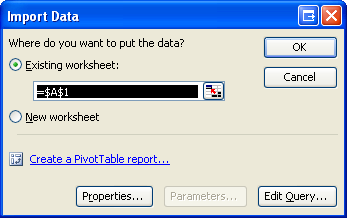
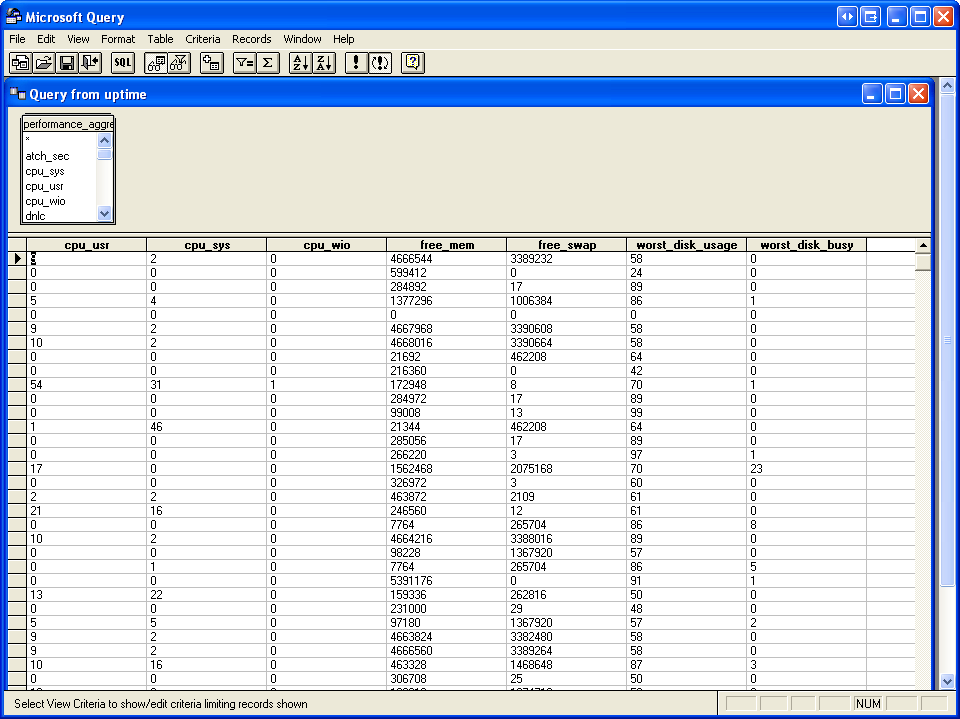
Click Edit Query to open Microsoft Query and preview the retrieved data:
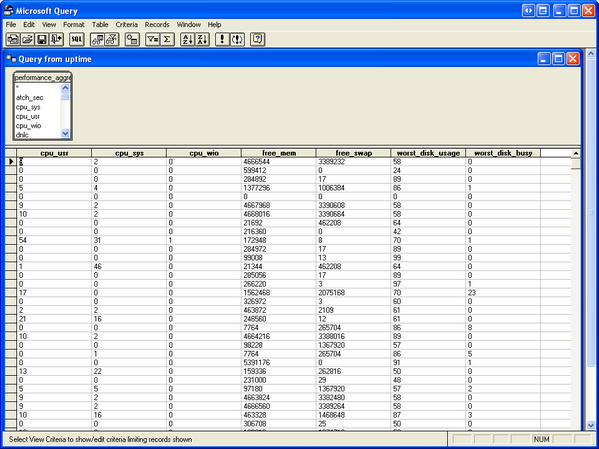
- Click the View menu, then click SQL to display the query. The columns you selected in the Query Wizard (step 4) will be displayed as the SQL statement:
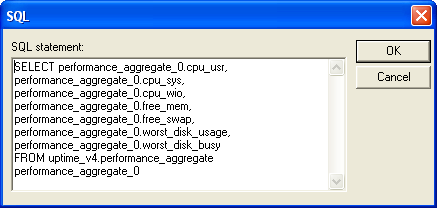
- Edit the SQL statment to refine which of the data from the selected columns will be used in the Excel sheet, then click OK to return to Microsoft Query.
- Click File, then click Return Data to Microsoft Office Excel.
Once your queried data is in an Excel sheet, you can work with it as required.