|
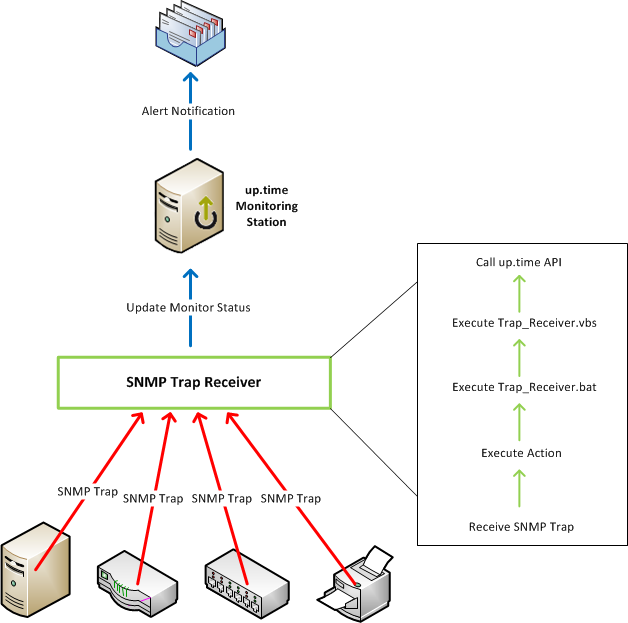
Article Contents The purpose of this article is to outline steps to easily deploy a trap listener in your infrastructure to drive SNMP trap alerts into up.time. Although the article utilizes Trap Receiver to receive SNMP Traps and execute scripts, one can use any SNMP trap receiver as long as it can execute scripts when traps are received. Trap Receiver is a utility for Windows. If the up.time Monitoring Station is on Windows, you may choose to install it on the same server. Here is a brief summary of what happens when an SNMP trap is sent:
Below is a diagram depicting the process:
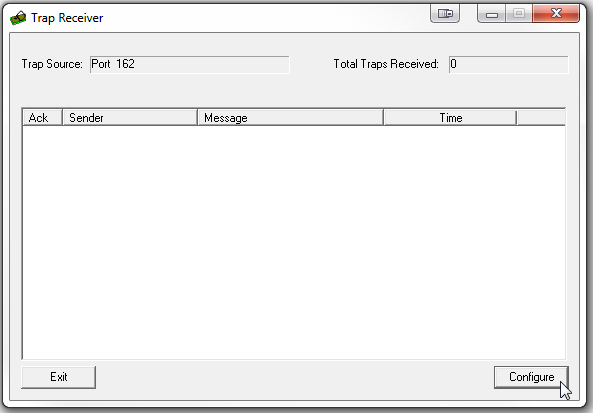
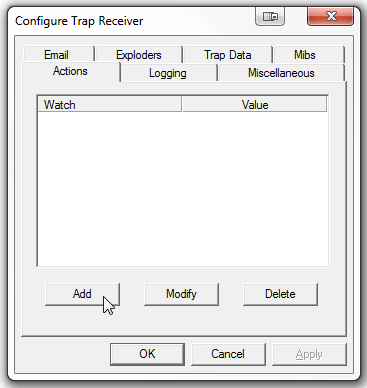
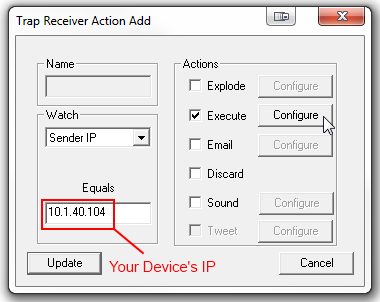
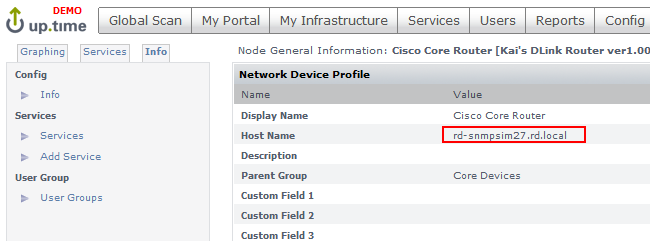
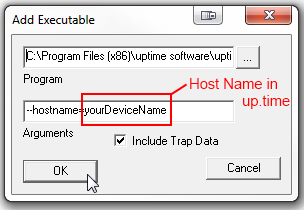
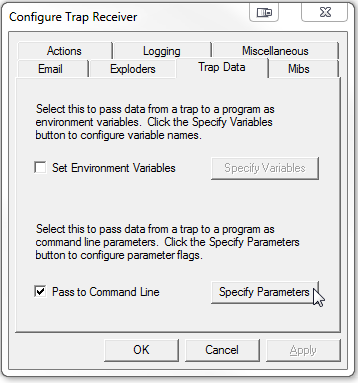
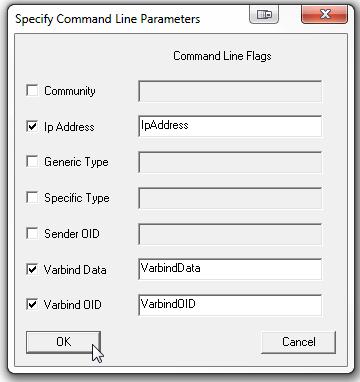
SNMP Trap Scripts Configuration
|
Article InfoIndex: 585 OptionsQuick Links |
Can an SNMP device be added as a Net-SNMP agent? | Rating | Views | |
|---|---|---|---|
| |
up.time's net-SNMP agent type is intended for server platforms. Most network devices (switches, routers, firewalls, etc...) do not have the full set of required MIB information and should be added... By: uptime Support | Date Created: 6-12-2010 | Last Modified: 9-13-2012 | Index: 449 |
 
|
4341 |
Net-SNMP Metrics | Rating | Views | |
|---|---|---|---|
| |
This article outline the metrics that up.time collects from a server that is running Net-SNMP. By: uptime Support | Date Created: 1-26-2007 | Last Modified: 6-30-2011 | Index: 131 |
|
11268 |
How do I add a Net-SNMP enabled server to up.time? | Rating | Views | |
|---|---|---|---|
| |
The net-SNMP element type is intended for servers that have a complete implementation of net-SNMP (www.net-snmp.org) installed on the target server. It generally does not work with network devices... By: uptime Support | Date Created: 12-31-2002 | Last Modified: 8-31-2011 | Index: 317 |

|
5841 |
Unable to browse MIB using the up.time SNMP monitor | Rating | Views | |
|---|---|---|---|
| |
When configuring the SNMP Monitor, you are able to add OID manually but can't browse the MIB by loading it. This can happen for a few reasons, but the most common is that the MIB you are trying to... By: uptime Support | Date Created: 10-14-2009 | Last Modified: 8-13-2011 | Index: 438 |
|
4626 |
up.time 7 SNMP Monitoring Quick Start Guide | Rating | Views | |
|---|---|---|---|
| |
up.time 7 SNMP Monitoring Quick Start Guide This KB article provides a quick introduction to setting up your SNMP Network Devices in up.time 7 as well as how to resolve common set up issues.... By: uptime Support | Date Created: 7-12-2012 | Last Modified: 10-27-2012 | Index: 578 |
|
6283 |